Bruker Alicona launches new FocusX measuring device
Estimated reading time 4 minutes
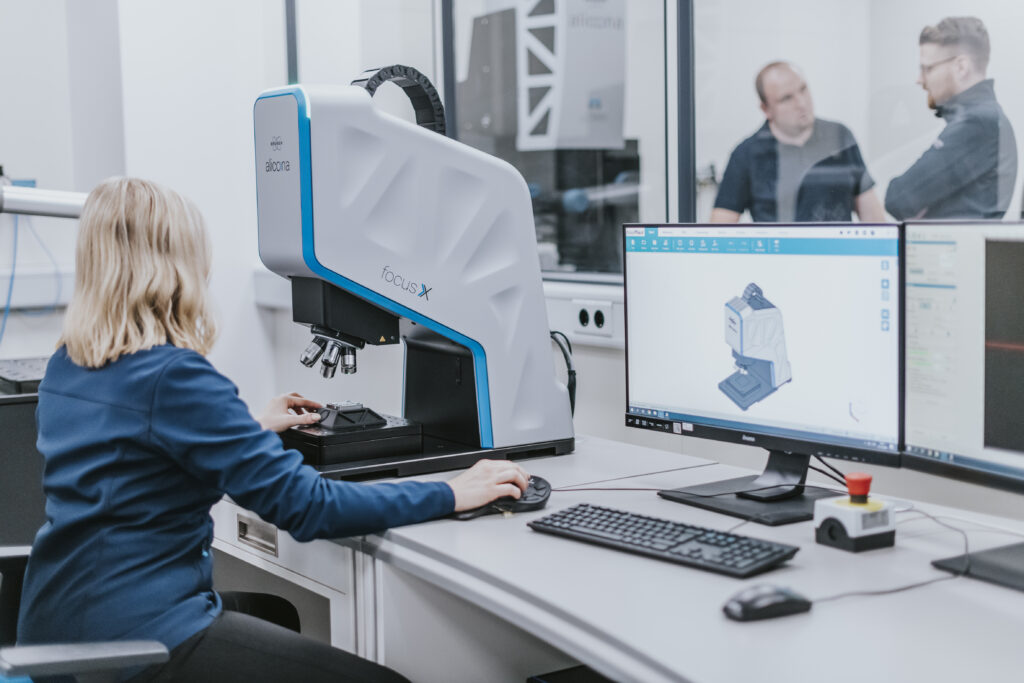
Two years of research and development, close to 10,000 working hours and 13 prototypes. But the outcome was worth every effort. Bruker Alicona presented its new addition to optical 3D measurement technology on January 29, 2024. FocusX is more versatile than any other measuring device in its class.

One measuring device, countless applications
“The aim with FocusX was to develop a system that solves customers’ most important measurement problems,” explains Urban Muraus, Managing Director of Bruker Alicona. “This relates to both the measurement tasks and the industries.” The requirement is also clearly met, as FocusX is perfect for measurements on complex and difficult-to-reach surfaces, as found in micro-precision manufacturing. Neither small radii nor acute angles pose a problem for the device. FocusX is the perfect partner for small tolerances. “We are also aware of the importance of the 3D representation of components,” Muraus continues, explaining the virtues of FocusX. With Real3D technology, the component is measured from different angles. As the name suggests, the different visualizations are merged into one 3D image.
“Non-contact measurement” – the buzzword of the future
The big advantage of optical measurement over tactile technology is that it works without contact, whereas tactile systems must scan the components. So how does the display work from different angles if the sample is not touched? “High-precision rotation and tilting axes ensure that the different perspectives can be operated. The generated 3D data then enables the measurement of contour and shape, as well as deviations,” continues Muraus. Non-contact measurement plays a special role in sensitive industries such as medical technology. The nature of the components poses an additional challenge here. Implants or prostheses are often characterized by steep flanks, complex shapes, and, finally, high-gloss surfaces. However, FocusX determines the dimensions, position, shape, and roughness of the parts in an automated, traceable, and repeatable manner. And all of this is contactless, of course.
ISO-compliant roughness without expert knowledge
Incidentally, roughness plays an important role in medical technology, as the surface quality is decisive for how an implant is accepted. However, human medicine is not the only industry that focuses on roughness in quality assurance. This is because it not only significantly influences the look and feel of components, but also their functionality. And even if it now seems retrograde, many companies still use tactile profile roughness measurement because it is well-established and seems easier. For the first time, however, FocusX allows users to carry out ISO-compliant roughness measurements with just a few clicks. The roughness measurement is designed to be particularly user-friendly and easy to handle. A reliable, accurate, and precise roughness measurement can be carried out without any expert knowledge.
Faster results
“The measurement technology must adapt to production and not the other way around,” says Muraus, explaining why speed also plays a role. Even in optical metrology, high-resolution representations of geometry must not take hours. That’s why FocusX delivers millions of measuring points within seconds and offers the option of automating all measuring tasks. “This makes FocusX the fastest measuring device in its precision class,” adds Muraus. He receives approval from Florian Reinle, Process Engineer – Simulation & Tribology at OTEC, who has been working with FocusX since November: “As an experienced user of Bruker Alicona measuring devices, I would say that the FocusX is hardly inferior to the higher-priced devices. It is fast and precise; the decent measuring volume is sufficient for most applications and the compact design convinced me straight away. FocusX definitely is a worthwhile addition.”
Unbeatable package
FocusX will be available to order from February 5. Delivery will start at the beginning of May. FocusX is equipped with Advanced Focus-Variation technology, which was first launched on the market with the Bruker Alicona µCMM (coordinate measuring machine). This is particularly suitable for measurements on extremely smooth surfaces and is also faster than the previous Focus-Variation technology. FocusX now makes this technology accessible to a wider audience, as the device offers an incomparable price-performance ratio. As a result, optical 3D precision measurement technology is suddenly also becoming an issue for companies that have previously only made inadequate use of tactile devices.
Bruker Alicona systems are available in the UK from Optimax Imaging and Inspection www.optimaxonline.com


