Nikon opens up about its strategic focus on Quality 4.0
Estimated reading time 7 minutes
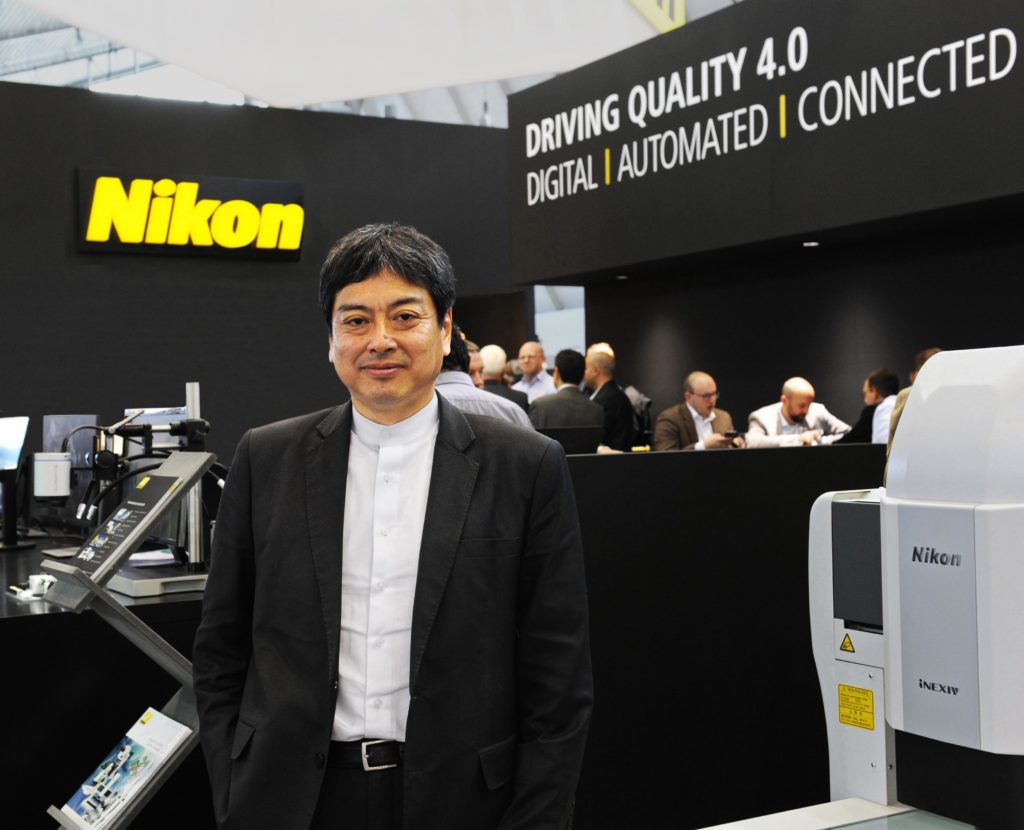
A recent interview with Nikon’s Corporate Vice President Tadashi Nakayama provides insight into the strategy of the firm’s Industrial Metrology Business Unit, of which he is Deputy General Manager. In particular, he explained the company’s strategic focus on Quality 4.0, where digital, automated and connected inspection enables complete process control from design through to manufacture.

The core elements of a Quality 4.0 based process are the requirement for automated measurement of key features on components, as close to real-time as possible, plus the need to acquire digital results and feed them back directly to machinery to control production automatically. In this way, the quality function drives the manufacturing process, guaranteeing the best possible products.
Digital, automated and connected inspection driving Quality 4.0
Nikon Metrology is committed to ensuring that its measuring systems lead the field in Industry 4.0 and this policy was underlined by Mr Nakayama. At the heart of Quality 4.0 is the interconnection of inspection and production. The goal is to enable manufacturers to produce better products at lower cost, speed up their response to changes in demand, shorten time to market and achieve an overall greater competitiveness.
Mr Nakayama observed, “The quality function must take the lead and be the driver of the manufacturing process. Measurement should no longer simply be an arbiter of pass or fail, but a means of continuously monitoring and adjusting the process to ensure that every component passes. When such a policy is adopted, downtime, scrap and costly reworking of parts become a thing of the past.”
“As industry changes, Nikon Metrology will also transform itself through a constant focus on improvement and innovations. We will continue to develop metrology equipment and software to exploit technological advances to the full and to deliver total solutions to suit customers’ specific requirements.”
He explained that the company’s strategic approach to Quality 4.0 is driving three areas: automation of inspection where possible and expedient; digitisation of results; and integration of metrology data into the production line, allowing processes to be fully optimised. A Quality 4.0 based process improves efficiency and flexibility, both necessary to make companies more competitive.
Unlike Industry 3.0, which was all about mass production, Industry 4.0 includes the possibility of bringing customised goods to the market at similarly competitive prices, thus giving high labour cost countries a competitive edge. This cannot be achieved if products are manufactured according to Industry 3.0, where inspection is often carried out using manual gauges, after which results are recorded by hand. If parts are detected to be drifting out-of-tolerance, the process is tuned manually, which takes crucial time and is operator dependent.
Inspection needs to be digitally integrated into the manufacturing process so it is compatible with analysis software tools within a central database and thus able to control the process via a feedback loop. It should also be automatic if possible, although this is not always mandatory, certainly in small installations or when starting out to put quality at the centre of a factory’s operation. Pragmatism and a step-by-step approach are often key when making changes in production processes.
The challenge with Quality 4.0 technology is to collect measured results in as near real-time as possible, hence the desirability of automation to speed up the rate at which data is recorded. Additionally, automated evaluation minimises the risk of human error when interpreting the results. Automation of non-contact inspection also allows the collection of much larger amounts of data for more meaningful analysis, including trend analysis. In parallel with the flow of information on the quality of components, data from the machinery producing them is also acquired, for example the temperature of a machine spindle or the injection pressure of a mould.
Artificial intelligence software is then employed to analyse the large amounts of information and correlate the QC data with the CAD model of the component and the machine data. In this way, it is possible to arrive at an understanding of where and why a drift from the centre of a tolerance band is occurring so that it can be continuously corrected. Earlier and much better insight into production performance is the result, allowing component accuracy, repeatability, reproducibility and traceability to be ensured, with the aim being 100 per cent yield.
Quality 4.0 is happening today
Nikon Metrology has already supplied Industry 4.0-enabled QC systems to customers in Europe, Asia and the US. One example in the German automotive industry involves rapid, automatic measurement of the position of studs on the underbody of cars in a production line to an accuracy of 100 microns using multiple Laser Radar systems. Feedback to the stud welding robots to adjust the process is currently manual, but plans are already in place to close the loop in the near future and automate this part of the procedure as well.
A major automotive OEM in the US has harnessed another non-contact inspection technique, Nikon Metrology’s L100 laser scanner mounted on a co-ordinate measuring machine, to check pre-production body-in-white panels. In the absence of the final press tooling, such pre-series panels have to be CNC trimmed in 3D by a laser cutter. It is inspection and optimisation of this final operation, previously carried out manually over a period of three days, that has been optimised by laser scanning to allow the cutter program to be updated in just four hours.
Within the automotive supply chain, electrical connectors are big business, there being an average of 2,000 in every vehicle. One such manufacturer, which makes six billion plastic injection moulded connectors per year, has adopted a policy of zero-defect production. It recognises that a faulty part can be at best an annoyance to a driver, possibly leading to costly warranty repairs or a recall programme by the OEM, or at worst fatal if the connector is part of the vehicle’s automatic braking system. For this application, Nikon Metrology supplied a turnkey, shop floor inspection system with handling equipment and software that automatically loads samples into a computed tomography (CT) scanner. If a housing is out of tolerance, it is rejected and an alarm is sent to the operator who stops and adjusts the relevant machine immediately to avoid production of scrap.
Another example is a manufacturer of low-cost chips used to track consumer goods in smart shops, for example, that has closed the production / QC loop to spot and correct for process drift. Nikon Metrology supplied a total solution, including an automatic wafer handler and an iNEXIV video measuring machine where glass wafers are inspected and the data sent to the plant control to keep circuit pattern dimensions within tolerance.
Future strategy – Focus on non-contact total solutions for Quality 4.0
Nikon Metrology’s strategy over the next few years will be twofold. First, from a technical perspective, collection of digital measurement data will be paramount to enable intelligent process control systems, whether it is local or in the cloud.
The company’s core competences that are being brought to bear in this area, according to Mr Nakayama, are laser scanning; X-ray including CT, which is especially suitable for high speed, non-destructive inspection of the interiors of additively manufactured parts; analysis and control software; and the renowned, high quality optics of its parent group. A fifth area of expertise that contributes to reliable generation of accurate measurement data is precision mechanics, such as the drives on the company’s video measuring machines and large-scale Laser Radar scanners.
Artificial intelligence algorithms being developed by partner companies will be utilised increasingly to help analyse QC data, which truly is ‘big data’ where 2D and 3D clouds of pixels and voxels generated by non-contact inspection are involved.
Secondly, Nikon is increasing the focus on building even stronger relationships with customers. Few in manufacturing will have missed the trend away from a supplier simply delivering a machine and leaving the user to get on with it, although amazingly it still happens. A ‘solution’ approach is essential these days and Nikon Metrology is strengthening its offering by entering into long-term business relationships with its global customers, providing support before, during and long after installation of a new process.
Future relationships with customers will be fostered to elevate them to the next level. It will involve continuous dialogue not only about all aspects of the user’s installation, but also on subjects as wide-ranging as sales, marketing and even research and development of new products.


